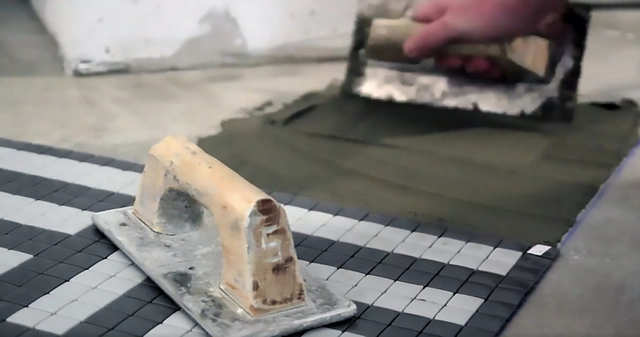
How to Install Mosaic Tiles | Hisbalit
  1. ArchDaily
  2. Products
  3. Glass
  4. How to Install Mosaic Tiles

How to Install Mosaic Tiles | Hisbalit

  • Available in

  • Use

    Interior, exterior
  • Applications

    Residential, commercial, hospitality
  • Characteristics

    Durable, quick and easy installation, reduced costs

1 Product File

By downloading any file you agree to the Terms of Use, Privacy Policy and to the communication of your data to the brand from which you download catalogs and files.

2 General Catalogs

By downloading any file you agree to the Terms of Use, Privacy Policy and to the communication of your data to the brand from which you download catalogs and files.
The product has been saved to the folder: My Downloaded Products
Hisbalit Logo

Contact manufacturer

Hisbalit

Hisbalit Logo

Contact manufacturer

Hisbalit

More from Hisbalit

Website Phone

More about this product

Glass mosaic tiles are growing in popularity due to its durability and endless design possibilities. This highly versatile material is suitable for both interior and exterior use for: floors, walls, facades, pools, chimneys, stairs, spashbacks, countertops, tables, shelves, bars, etc.

Hisbalit mosaic tiles offer an extremely durable product that is resistant to sun, rain, extreme temperatures and sudden temperature changes. The following is a step by step guide to install mosaic tiles correctly with the HT-K system, ensuring the best results both aesthetically and functionally.

Tools Required
undefined
  • Narrow notched trowel: 3 mm notch - NB! One of the most common errors when installing mosaic tile is using a trowel with thick notches.
  • Sponge trowel
  • Rubber or wooden block
  • Sponge
  • Squeegee
  • Tile nippers - Recommended for cutting small pieces of tile or for finishes requiring irregular or curved forms.
  • Radial tile cutter or grinder - Recommended for straight cuts longer than 1 cm. This is the ideal tool for cutting pieces of mosaic tile joining other materials along straight lines. This should be a small-size, medium powered tool with speed control. Cuts should be made at moderate or even low speed, using a 115 mm glass cutting disk.

How to install mosaic tiles with the HT-K system

The HT-K System is a revolutionary fixing system that uses an exclusive thermo-polymer bead to join all the pieces of the tile sheet. Using this system ensures a quick installation. Easily trim sheets with a cutter and store outdoors.

By combining the proper adhesive and jointing material, HT-K is the only system that prevents tesserae from becoming detached over time, guaranteeing inalterable results. This method results in a ductile and highly durable tile sheet that adapts perfectly to surfaces which helps reduce costs in time and money in the long run.

Steps

  1. Spread a 2-3 cm thick layer of adhesive cement onto the surface using a notche trowl.
  2. Place the mosaic tiles on the adhesive cement, ensure to align carefully so create a distance of 2 mm between each tile for all joints to be the same.
  3. Tap with a wood or rubber trowel in order to penetrate the layer of adhesive cement with the tiles.
  4. Once the adhesive cement is dry, fill the joints with the special mortar for joints using a special trowel.
  5. Use a rubber squeegee to remove any remaing adhesive.
  6. Clean with a damp sponge
  7. Finish off by wiping the mosaic off with a dry cloth.

Mistakes to look out for

  1. Not preparing the surface properly. The surface must be level, stable, clean and dry. The ideal surface is a thin layer of water-repellent mortar.
  2. Using a trowel with notches that are too thick. No more than 3 mm!
  3. Using too much adhesive cement.
  4. Not having the correct spacing between the sheets. Unmatched lines of tile can give an irregular and unsightly finish.
  5. Not cleaning excess grout from the joints.

Latest Catalogs and Files

By downloading any file you agree to the Terms of Use, Privacy Policy and to the communication of your data to the brand from which you download catalogs and files.
See All
Hisbalit Logo

Contact manufacturer

Hisbalit

Hisbalit Logo

Contact manufacturer

Hisbalit

More from

Hisbalit

Website Phone

Contact manufacturer

Hisbalit Logo

Contact manufacturer

Hisbalit

Related Products

View more related products »
Wall and Floor Tiles - Elements Collection

Wall and Floor Tiles - Elements Collection

Hisbalit
Mosaic Tiles in Impact Hub Co-working Space

Mosaic Tiles in Impact Hub Co-working Space

Hisbalit
Contact us