Every project begins with a program brief outlining the spaces, areas, and requirements essential to kick off the design process. This essential document guides architects in understanding client needs, allocating space efficiently and ensuring the design meets the project's functional requirements.
However, manually converting this tabular data from a spreadsheet to spatial data in your massing tool is incredibly tedious and time-consuming. Tools such as Snaptrude are designed to help architects iterate faster and make more informed design decisions.

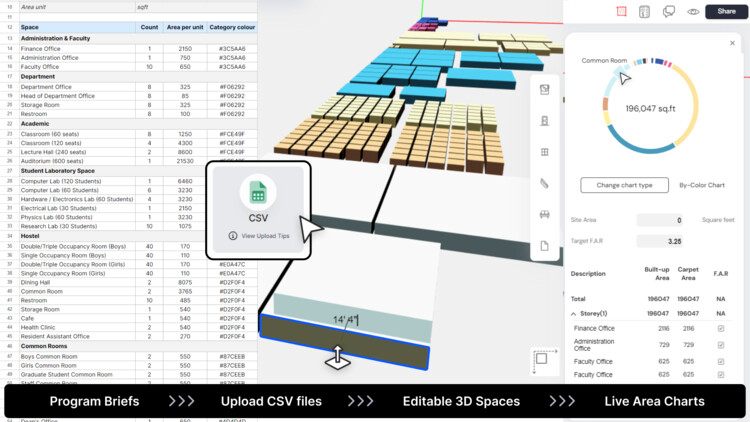
Program Import is a new feature that allows architects to instantly convert program briefs in .csv or .xlsx formats into 3D spaces in Snaptrude. This significantly accelerates the initial design process and can already be used on Snaptrude’s website.
Getting started is remarkably straightforward. Users can easily import architectural program briefs as editable 3D spaces by utilizing CSV files. Here’s how:
- Drag and Drop or Click: Simply drag and drop your .CSV files directly into a Snaptrude project, or click on the ‘CSV’ button within the interface.
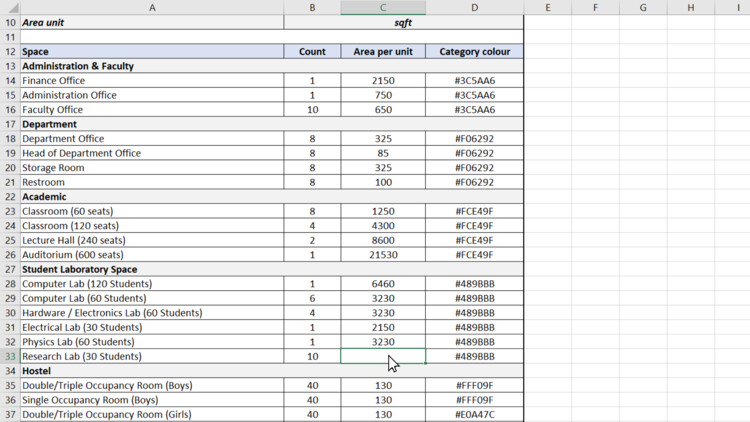
- Download the Template: Download Snaptrude’s CSV file template, designed for easy readability by the software. The first few rows of the template provide helpful tips for filling it out.
- Filling in the Fields: Follow these guidelines to ensure your data is correctly interpreted by Snaptrude:
- Area Unit: Enter either sqm (square meters) or sqft (square feet).
- Space: Name the room or area, which will act as a label for the space type object in Snaptrude.
- Count: Specify the number of masses you want to create with the same space name.
- Area per Unit: Indicate the total area for each mass created under the corresponding Space name and Count.
- Category Color: Assign colors to different spaces using HEX codes, helping categorize and visually distinguish them.
- Upload to Snaptrude: Uploading the file instantly converts the data into editable 3D spaces within the platform’s canvas. These spaces are organized by area and color. Spaces with multiple counts are linked copies, so you can edit them all at once.

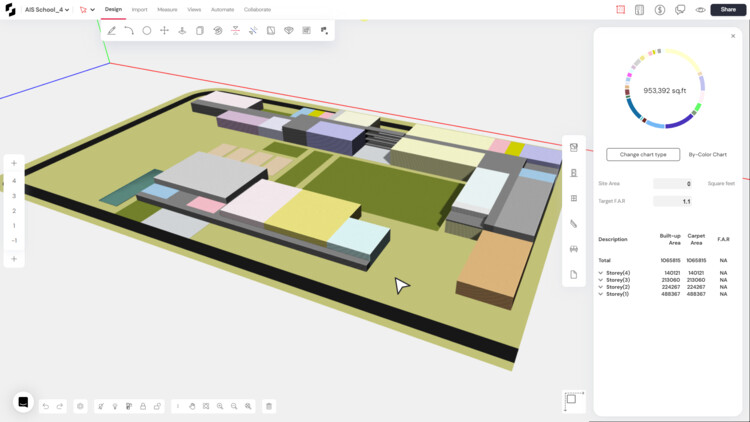
From there, you can kickstart the design process. The user-friendly interface empowers architects to experiment with different massing options by manipulating and stacking these 3D spaces.
The Areas tab plays a crucial role by continuously tracking updates to project areas, ensuring designs stay aligned with project requirements. The “By color” area chart visually represents the imported spaces based on their assigned colors, offering a clear breakdown of the area occupied by each space type within the design.

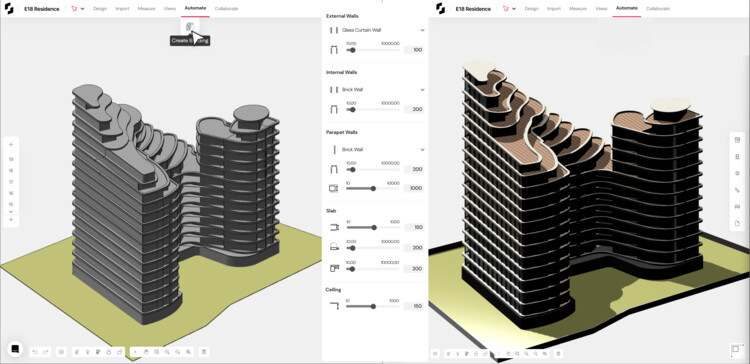
Once you've explored your initial design ideas and have a basic massing model in place, use Snaptrude's Create Building tool to convert massing models into a detailed building with walls, slabs, and floors with just a click.
By eliminating the tedious manual data entry bottleneck, Snaptrude allows architects to spend valuable time on iterations and design development during the early stages. With a streamlined workflow and a clear understanding of how design decisions impact project requirements, architects can now get to a detailed model from an area program within a few minutes.

